How to Change the Favicon in WordPress: A Comprehensive Guide
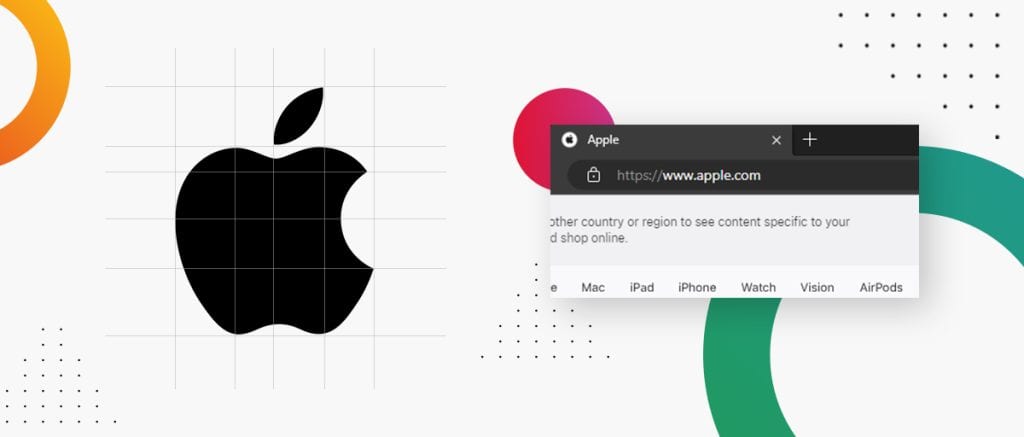
The favicon on your website, also known as the ‘tab icon,’ is like a tiny emblem that gracefully dances alongside your page title in the browser tab. It may seem like a minor detail, often overlooked until its absence or mismatch with your website design becomes apparent. But make no mistake – this little but meaningful symbol doesn’t stop there. It proudly shows up when users bookmark your webpage or add it to their mobile home screens, making it an absolute must-have. A favicon is an invaluable piece of your brand identity puzzle that, despite its minuscule size, captivatingly influences how users perceive and remember your brand.
For those using WordPress, there’s good news. Changing the favicon is a user-friendly process that doesn’t require any advanced coding skills. In this comprehensive guide, we will walk you through each step of changing the favicon on your WordPress site in detail, offering tips for choosing the right image, ensuring it’s optimised for various devices, and maintaining consistency across all platforms.
Step 1: Understand the Importance of a Favicon
Before we delve into the process of changing your favicon, it’s helpful to understand why it’s so important. A well-designed favicon boosts your brand’s visual identity, aids in user navigation, and enhances the overall user experience. It serves as a visual cue for users to quickly locate and return to your site among their numerous open tabs or bookmarks.
In addition, having a favicon adds a professional touch to your website. It shows that you pay attention to every little detail, thus instilling trust in your visitors. The absence of a favicon could make your website appear incomplete or less professional.

Step 2: Choose Your Favicon
The first practical step in changing your WordPress favicon is selecting the image you want to use. This is not a decision to be taken lightly – the image should be simple, effectively encapsulating the essence of your brand identity. Your favicon image should ideally be in ICO, PNG, GIF, or JPG format.
While the image size can vary based on design preferences, using a square image with dimensions of at least 512×512 pixels is generally recommended. This size ensures that your favicon remains clear and recognisable even when scaled down to fit into a small browser tab.

By thoroughly evaluating a designer’s experience and portfolio, you can gain confidence in their ability to create a high-quality, professional website that aligns with your business needs and goals.
Step 3: Design Considerations When Choosing Your Favicon
Choosing a favicon requires thoughtful consideration. Given its small size, opt for a design that maintains clarity when scaled down. The text might not be readable at such a small size, so it’s often best to avoid it unless it’s a single letter or number. The most effective favicons are often simple shapes or symbols.
Also, consider how your favicon will look against different browser backgrounds; it should stand out against light and dark themes. Testing your favicon against various backgrounds can ensure it remains distinguishable regardless of user preferences.
Lastly, ensure that your favicon aligns with your brand style and colour scheme. Consistency in branding is key – a mismatched favicon could confuse and dilute your brand identity.

Step 4: Upload Your Favicon Image to WordPress
Now that you’ve selected and optimised your favicon image, the next step is to upload it to WordPress. First, navigate to your WordPress admin panel. Here, click on Appearance > Customise. In the Customise menu that appears next, click on Site Identity. Within this section, click on the Select Image button under the Site Icon subsection.

This action will open the media uploader in WordPress, an easy-to-use tool that allows you to upload your favicon image by either dragging and dropping it into the uploader or selecting it from files on your computer.
Step 5: Crop Your Favicon Image
After the upload, WordPress allows you to crop your image to suit the favicon’s dimensions. This feature is particularly helpful in ensuring that your favicon looks good across different devices and platforms.
Once you’re satisfied with the cropping and how it looks in the preview, click on the Save & Publish button to save your changes.
Step 6: Check Your Favicon
After uploading and adjusting your new favicon, it’s important to ensure it has been installed correctly. To do this, open your website in a new tab or refresh the current tab where your site is open. Your new favicon should now be visible in the browser tab.
If it doesn’t appear immediately, consider clearing your browser cache and refreshing the page again. Sometimes, browsers store information from previous website visits, including favicons, so clearing the cache can help update this information.
Step 7: Update Your Favicon on Social Media Accounts
Consistency is key in branding. Therefore, after changing your favicon on your website, you should also update it on all your social media accounts. This uniformity helps strengthen brand recognition and ensures that your online presence is cohesive across all platforms.

Most social media platforms provide specific guidelines for uploading favicons, which can usually be found in their Help or FAQ sections. Be sure to review these guidelines before proceeding to upload your new favicon.
Step 8: Keep Regularly Updating Your Favicon
While a favicon represents your brand, it’s not something that needs to remain static forever. As your brand evolves, so too should your favicon. Regularly updating your favicon ensures that it stays relevant and continues to represent your brand accurately.
Conclusion
Changing the favicon on your WordPress site may seem minor, but its impact on your website’s branding and overall user experience is significant. Following this comprehensive step-by-step guide lets you change your favicon quickly and easily.
Remember that a favicon serves as a visual representation of your brand across all digital platforms. Therefore, take the time to select an image that encapsulates your brand essence and ensure it is updated across all your online platforms.
With this detailed guide and a carefully chosen favicon, you are well on your way to establishing an even stronger and more professional brand identity. So whether you’re just starting out or looking to refresh an existing website, never underestimate the power of a well-chosen favicon!


Author: Martin Sanders
I empower businesses to connect with their customers and boost sales. Ready to take your revenue to new heights? Get in touch with me today, and let’s make it happen!


